Showing posts with label special. Show all posts

Tuesday, January 7, 2014

Your Cheese Needs Bread


Since we were making Fondue from scratch this year (I really think the ready made ones are fine, but a splash of Kirsch and a little fresh nutmeg would make it fantastic), I decided I would try making bread from scratch as well - though I did go buy a loaf just in case. And part way through, I thought I would need it. I found this recipe on Facebook through one of my groups, however, tracked it back to its source, here.
Making this bread was super simple. The only thing we noticed was that the cheese preferred to stick to the store bought bread better (and that may have been because I did not get it to rise properly)

What you need:
250 g flour
200 ml water
50 ml olive oil
10 g of fresh yeast (the cake yeast you can get in 42 g blocks)
1 tsp salt
extra flour for sprinkling.

Ok, the original recipe told me to mix everything together and let it sit. However, after reading about cake yeast, I think you need to do things a bit differently.

First, crumble the yeast and put it in a small bowl with your water - make sure it is warm, but not hot. Let it sit for 5 to 10 minutes until it starts to bubble.

Add the rest of the ingredients. Let sit for 20 minutes.


On baking paper, form the dough into a rectangle. Using a round pizza cutter - if you have one - dip it in flour so the edges do not stick, and cut the dough into a bite sized grid. Mine were a little on the large size and I would make them smaller next time.

not having used the proper yeast activation method..it still formed a rough rectangle


Sprinkle the top with a little water (or use a brush) and then sprinkle with a bit of flour.


Let sit for 10 minutes.


Cook at 210 for 20 minutes.

As you can see, it rose in the oven anyway


It was really good, even though I didn`t let the yeast sit out first. My dough didn`t actually rise like I imagined it would, so I will be making this again soon.


Friday, January 3, 2014

Peppermint Oreos


Here is just a fun little thing I made as a stocking stuffer for hubby this year. He insists on having a giant stocking, and when we were in the US, that was fine, however here it is a little difficult to fill (though he does tell me I don`t need to, he just likes it). Mmhmm...yes, so well, in an effort to add more to it, I decided to do a bunch of different baked goods. Some turned out good, some not so good, but apparently this was the favorite, so here you go.


What you need:
1 package oreos
250 g white chocolate, melted
candy canes (Ikea has a candy section now with peppermint candies - they would probably work as well)


First, put the candy canes in a sealed plastic bag and put a piece of thin cardboard on top. Using a hammer, bash them until they are the size you would like. I went with tiny.


Melt the chocolate. I have a small melter, but you could use the microwave - 30 seconds at a time, stirring in between until melted. Or, you could use the stove. If you have a double boiler, use it, otherwise a pot with a pan that fits on top. Add water to the pot and place the pan on top. Add the chocolate, chopped up (make sure no water touches it). Heat until melted.


Lay some parchment paper down and dunk your oreo in the chocolate. Carefully flip over so both sides are coated. Lay on the paper.


Put the crushed peppermint in a fine sieve and then gently sprinkle on top of the melted chocolate. As the chocolate hardens, it will stick.


Repeat..and make sure you try one for quality control :)


Roll in paper and tie with a string, or put in a jar...these freeze well so you can make them ahead of time, or just have them for when you want a snack.


Wednesday, November 20, 2013

Cinnamon Roll Snowflake


Cinnamon rolls just call to you on those early cold mornings...unfortunately, the recipe I have takes a really long time to make, so you either have to get organized the night before or enjoy them in the afternoon.  I`ve been looking for ways to make them easier to make...just when we are craving the taste and there isn`t much time. I have seen recipes where you use the crescent roll dough to make them, and I can get the Pillsbury can...in Germany, but I don`t always plan ahead that far, so wanted something closer to home. (all of you with access to it though, feel free to use that dough instead).

The great part about this recipe is how versatile it is.  I made cinnamon rolls. You could use pizza dough and make a pizza appetizer. Or garlic bread. Use your favorite bread recipe and add cheese, or bacon, or herbs. Or chocolate. Whatever hits your fancy. Enjoy.

What you need:
3 circles of kuchenteig  (pie/pastry type dough) - I used an upside down pie tin to make them all the same
4 Tbls sugar
2 Tbls cinnamon
softened butter

For the topping:
powdered sugar
or
powdered sugar and milk


First, spread out your dough. You can buy circular dough, which would save you an extra step.  If you have rectangular dough, place a pie tin, or other large round dish on your dough and cut around it with a knife. You will repeat this 3 times.


Spread a little butter across the surface of your first circle.


Mix your cinnamon and sugar together well, and then sprinkle about 1 1/2 Tbls across the surface.


Place your second dough circle on a board and cover it with butter. Place it on top of your first circle and sprinkle with more of your sugar mixture.


Place the 3rd circle on top.


Very lightly, score the surface into equal portions


Cut through the dough about 1/4 of the way from the center so you are leaving a circle shape intact in the middle. Repeat all around.


Loosen 2 of the sections and carefully twist twice, or 3 times if you have enough left. (you should) Carefully squeeze the bottoms together so they are connected at the base. Continue for the rest.


I had extra dough, so figured I`d make actual rolls as well.


Bake in the oven, mine were at 220 C for about 25 minutes (the back of the dough said 30-35, but you will need to check earlier unless you are using the entire amount of dough).


Sprinkle with powdered sugar for a snow effect, or mix together 1/2 cup of powdered sugar and 2 tsp of milk until you get a consistency of not liquid and not solid, easy to drizzle, and add to the top for a gooey icing.


with sugar

with icing


Using pizza dough, grainy mustard, ham and gruyere cheese

delicious. mustard on bottom layer, ham and cheese on second

Using the round kuchenteig insted of cutting it. Much bigger, cooks a bit more evenly
Left as a rectangle, cut into a Christmas Tree shape - watch the cooking time though, it doesn`t take as long.


Sunday, August 18, 2013

Margarita...Cupcakes?!


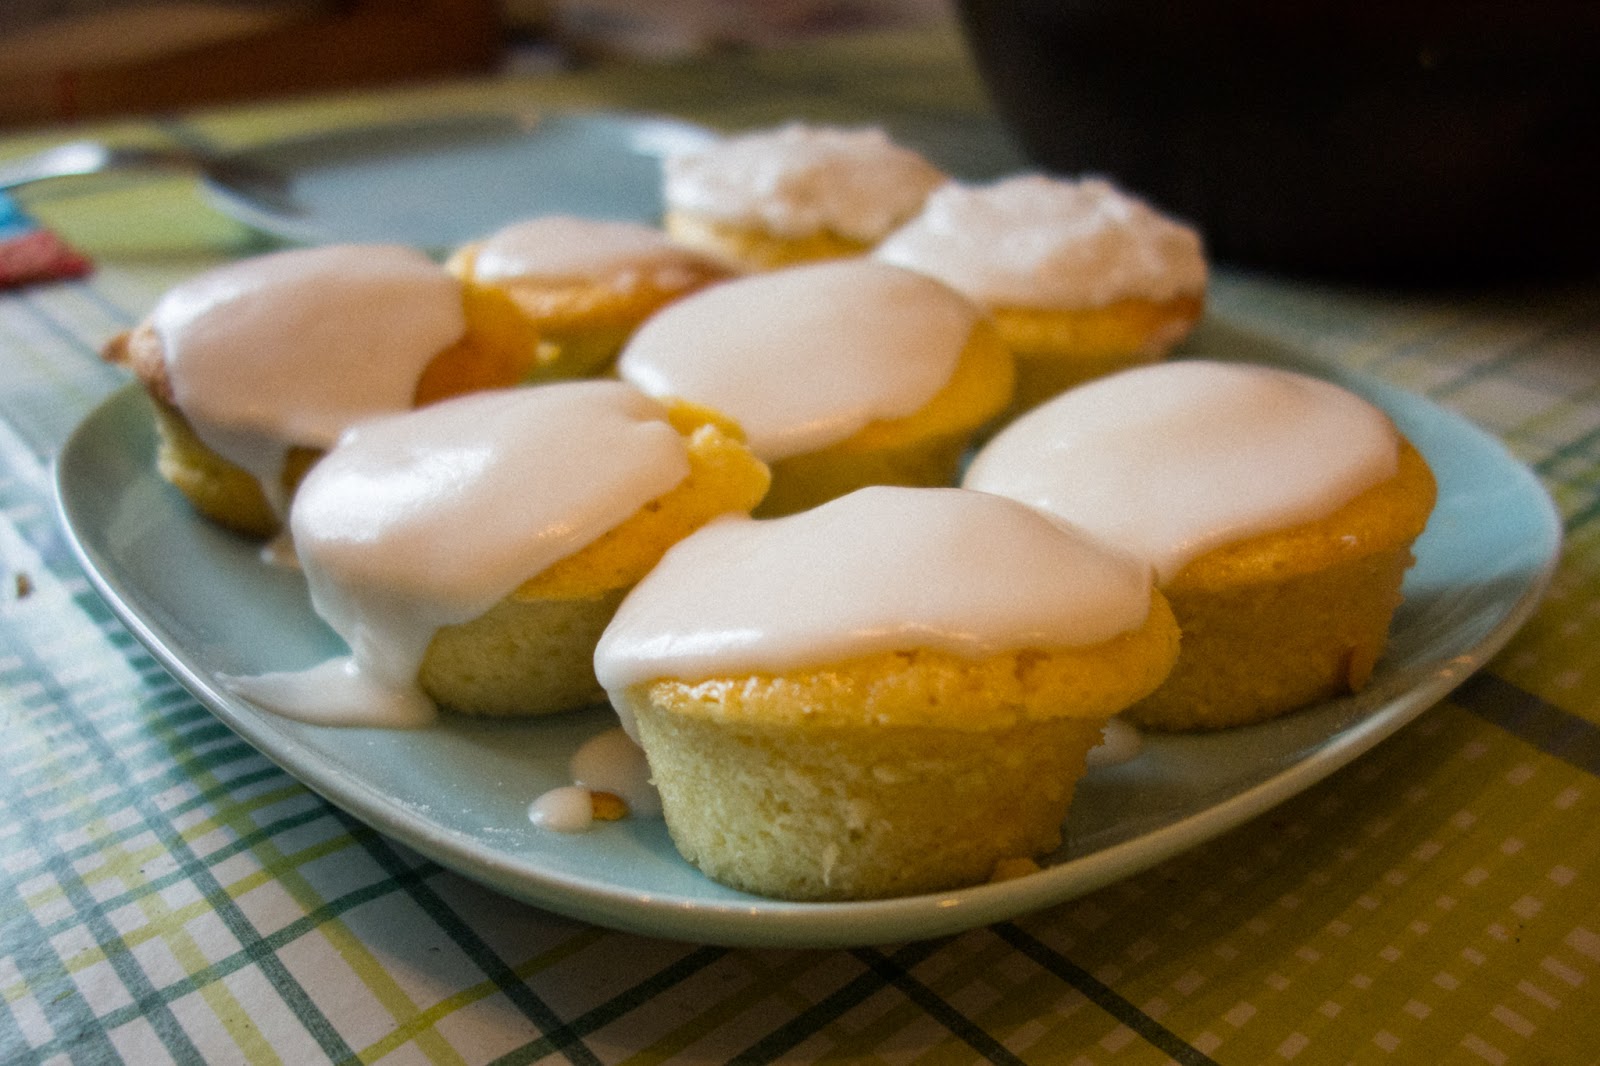
A few months ago, for Cinco de Mayo, we made fajitas. What goes with fajitas? Frozen margaritas! Unfortunately, I don`t have a blender, and until recently, we didn`t have enough room to even make ice, so that was out. Luckily, last year, while looking for Cinco recipes, I stumbled upon a website with the most fantastic cupcakes ever. Margarita cupcakes. Adult only. I did make the kids pinata cookies though, so no one was left out. These are fantastic. You can change the content of the tequila in the icing to make it stronger or weaker, so no worries. Also, if possible, I would buy your tequila in Germany as I ended up paying 25 chf for a small bottle. Sad, but I also needed it for a marinade, so all was not lost.

Here is where I found the original recipe. Her pictures are gorgeous. This is the second time I had made them and since it was just us this time, I was more interested in the eating of them than making them look beautiful. Check out her page. I also changed the recipe the second time, but did follow hers the first.

What you need:

1.5 cups flour
1.5 tsp of baking powder (backpulver)
1/4 tsp salt
1/2 cup room temperature butter
1 cup sugar
2 room temperature eggs
zest and juice of 1.5 limes
2 Tbls tequila
1/4 tsp vanilla
1/2 cup milk + 1 tsp lemon juice OR 1/2 cup buttermilk

For the frosting:
3 Tbls powdered sugar with 1 1/2 Tbls tequila. This will make a thick icing. See the original recipe for another frosting option

For extra tequila flavor, before icing the cupcakes, brush them with some more tequila (about 1-2 Tbls total)

I used a silicon muffin pan, if you don`t have one, make sure to use cupcake or baking cups.

In a bowl, mix together the flour, backpulver and salt.


In another bowl, beat the butter and sugar until light and fluffy.


Add the eggs, mixing in between. Add the lime zest, juice, vanilla and tequila. Mix well. If it looks like curdled milk, you`ve done it right.


Add the flour mixture, alternating with the buttermilk (or milk and lemon). Mix only lightly. Once everything is blended, stop.


Pour the batter into the muffin pan, cook at 160 C for about 25 minutes. Stick a toothpick in the muffin to tell if they are done. If it comes out wet, add another 2 or 3 minutes. If dry, you are done.


Let the cupcakes cool. If you wish, brush the tops with tequila and then add the icing once they are completely cool. If you won`t be using them all immediately, it is easier to just ice the ones you need as you can seal the rest in a bag of dish.

To ice, put the powdered sugar in a small bowl and add the tequila. Mix until incorporated. You want it to have enough liquid to spread easily, if you end up with it too runny, just add a bit more sugar. You can use a spoon/knife to spread the icing, or an icing bag if you would like it to look more decorative. Next time I make these I will do that to show you. (And take a few better pictures)

That`s it, enjoy!