Showing posts with label Seasonal. Show all posts

Tuesday, January 7, 2014

Your Cheese Needs Bread


Since we were making Fondue from scratch this year (I really think the ready made ones are fine, but a splash of Kirsch and a little fresh nutmeg would make it fantastic), I decided I would try making bread from scratch as well - though I did go buy a loaf just in case. And part way through, I thought I would need it. I found this recipe on Facebook through one of my groups, however, tracked it back to its source, here.
Making this bread was super simple. The only thing we noticed was that the cheese preferred to stick to the store bought bread better (and that may have been because I did not get it to rise properly)

What you need:
250 g flour
200 ml water
50 ml olive oil
10 g of fresh yeast (the cake yeast you can get in 42 g blocks)
1 tsp salt
extra flour for sprinkling.

Ok, the original recipe told me to mix everything together and let it sit. However, after reading about cake yeast, I think you need to do things a bit differently.

First, crumble the yeast and put it in a small bowl with your water - make sure it is warm, but not hot. Let it sit for 5 to 10 minutes until it starts to bubble.

Add the rest of the ingredients. Let sit for 20 minutes.


On baking paper, form the dough into a rectangle. Using a round pizza cutter - if you have one - dip it in flour so the edges do not stick, and cut the dough into a bite sized grid. Mine were a little on the large size and I would make them smaller next time.

not having used the proper yeast activation method..it still formed a rough rectangle


Sprinkle the top with a little water (or use a brush) and then sprinkle with a bit of flour.


Let sit for 10 minutes.


Cook at 210 for 20 minutes.

As you can see, it rose in the oven anyway


It was really good, even though I didn`t let the yeast sit out first. My dough didn`t actually rise like I imagined it would, so I will be making this again soon.


Friday, January 3, 2014

Mushroom Accompaniment


I am not actually sure what to call this. It is a sauce, a spread and a dip. Spraucip?
I made this to try out for our our Christmas Eve Fondue Chinoise for the meat and ended up putting it on just about everything. I found the recipe on Swissmilk - it`s a fantastic website that has their recipes divided up into a lot of categories for simple use. I changed the reicpe a bit to suit our tastes, but overall, stuck to it for the most part.
Unfortunately, I can`t tell you how long it lasts as it was gone by the end of dinner, however you can`t make it more than half a day in advance, so probably not very long.

What you need:
15 g dried porcini mushrooms (you can buy 30 g bags easily)
150 g rahmquark - had never actually used this, so just bought the Coop brand
80 g sour cream
1 1/2 Tbls chopped fresh parsley
1.5 -2 cloves garlic, depending on your taste. I used 2
2 Tbls Cognac (again, depending on your taste)
pinch of salt, ground fresh pepper.


First, you will need to soak the mushrooms in warm water for 10-15 minutes. Remove and pat try, then chop finely.

Mix the other ingredients in a bowl, omitting the garlic and cognac. Add the mushrooms. Add half the garlic and congac and taste. If desired, add more.


Sprinkle with a bit more parsley and cover, put in the fridge until ready to use.


Enjoy!

It`s also yummy spread on fresh bread!

Sunday, December 15, 2013

Pizza Bites

Snowman shaped pizza bites. 


I was looking for a fun appetizer to bring to a Christmas party, and saw a Christmas tree version of this on Pinterest. I`ve changed the recipe a bit to make it easier (lots of kids around), but here`s the original link.

What you need:
 Pizza dough - I just used store bought this time
Italian blend seasoning - or any pizza seasonings you enjoy
Cream cheese - about 115-150 g depending on how much dough you have
Mozzarella or pizza blend cheese - 1 cup, or about 150 g
(You may want to use the entire 200 g container and the entire bag of cheese for the XL dough)
Pizza sauce - I just used one from a jar this time.
Melted butter for brushing over the top
Finely minced garlic - about 1 tsp
Basil for garnishing the top - I used dried, but fresh would be great.

First roll out your dough and slice it into squares. Mine were a bit on the small side, you want them probably to be at least 1.5 x 1.5 inches.


Mix your cheeses together.


Sprinkle the Italian seasoning (or oregano, etc) on your dough. Place a small ball of the cheese in the middle of the dough.


Add a dollop of pizza sauce - a tiny bit goes a long way!


Fold over the corners until you have something resembling a ball. Place it seem side down on either a baking tray or a shaped pan. Don`t squish them together, put put them next to each other.


Put in the oven at 230 C for 12-15 minutes. Until the top is a golden brown.

Just before the pizza finishes cooking, melt some butter and add your finely minced garlic. Brush it over the top of the pizza balls and then sprinkle with basil.


Enjoy!


Saturday, November 30, 2013

Cornbread


My only cornbread experience was in 5th grade, and they were serving corndogs for lunch. I`m sure part of it was cafeteria food, but it was horrible. Anything that said cornbread, I stayed away from.  Until last night. We had our Thanksgiving a day late as it`s not a holiday here, and I tried to make some things that my husband`s family would eat, as well as my own. This was my first attempt at cornbread, and so of course, I asked my MIL for her recipe. I really have no idea where it came from, but I can tell you, that from someone who didn`t think they liked it, it was delicious.

 This is a slightly sweetened version. I know you can make it unsweetened as well. Also, I poured a bit of gravy on mine as it was a bit dry/crumbly - compared to normal bread. Not dry like you had to guzzle a glass of water after each bite :). Apparently it was supposed to be. Hubby used butter and honey. Enjoy with your favorite topping!

What you need:
1 cup of flour
1 cup of fine grain polenta
1/4 cup sugar
1 cup milk (I used skim)
1/4 cup butter (53g)
1/2 tsp salt
4 tsp baking powder (1 sachet of backpulver)
1 egg


First, mix the dry ingredients together and set aside.


Mix the liquid ingredients.


In a heavy pan (iron skillet, etc, something that you can bake it in as well as use on the stove), melt the butter.

Add the dry ingredients to the liquid, and mix well. Add the melted butter. Mix thoroughly and pour back into the pan. Bake in a 220 C oven for 20 minutes, or until golden brown on top.


Wednesday, November 27, 2013

Jellied Cranberry Sauce


Can`t have Thanksgiving without it.  At least I can`t :)  It was so wonderful being home last year and having all the goodies that go with Thanksgiving. Makes it harder to be away from home though when there is a special occasion that you are used to having certain things. No harder really than being married to someone who likes the opposite of what you do for Thanksgiving. Luckily my mom and mom in law both have given me great recipes, so my hubby and I can both be happy. Means more cooking, but only one person eating certain things means Thanksgiving lasts for more days. And that`s a good thing.

We always had jellied cranberry sauce. Out of the can. My favorite thing do do was open it and upend it, hoping to keep it all in one piece before I could knock it over. Of course, this was many many years ago (or maybe last year. ha.) I would always have my mom send me some over here. Hubby`s family preferred the whole berry kind. <Shudder>. Luckily my awesome MIL always provided both so everyone was happy.

This year, I didn`t have my precious can. So I scoured the internet biting my nails in anticipation of all the strange things I would need as I expected anything I made would end up as cranberry juice. So I embarked on an adventure today. I put it off because I was afraid it wouldn`t work. Now I`m worried I won`t be able to wait as I had to try a teeny tiny bite. It`s fantastic. All the goodness of a can, yet better. Oh, and you can make it whatever shape you want. I just used a tuperware container as I need to wait 2 days and wanted it sealed.

What you need:

 340 g cranberries (about 12 oz, or one bag) - I bought mine at Migros. Coop usually has Ocean Spray bags.
1 cup sugar
1 cup water
metal sieve for straining


Put the water and sugar in a pot and bring to a boil (about 5 minutes)


Add the cranberries and turn down the heat to a gentle boil. They will start to make popping sounds (I put a top on as I didn`t want cranberry juice everywhere). Mix gently frequently.


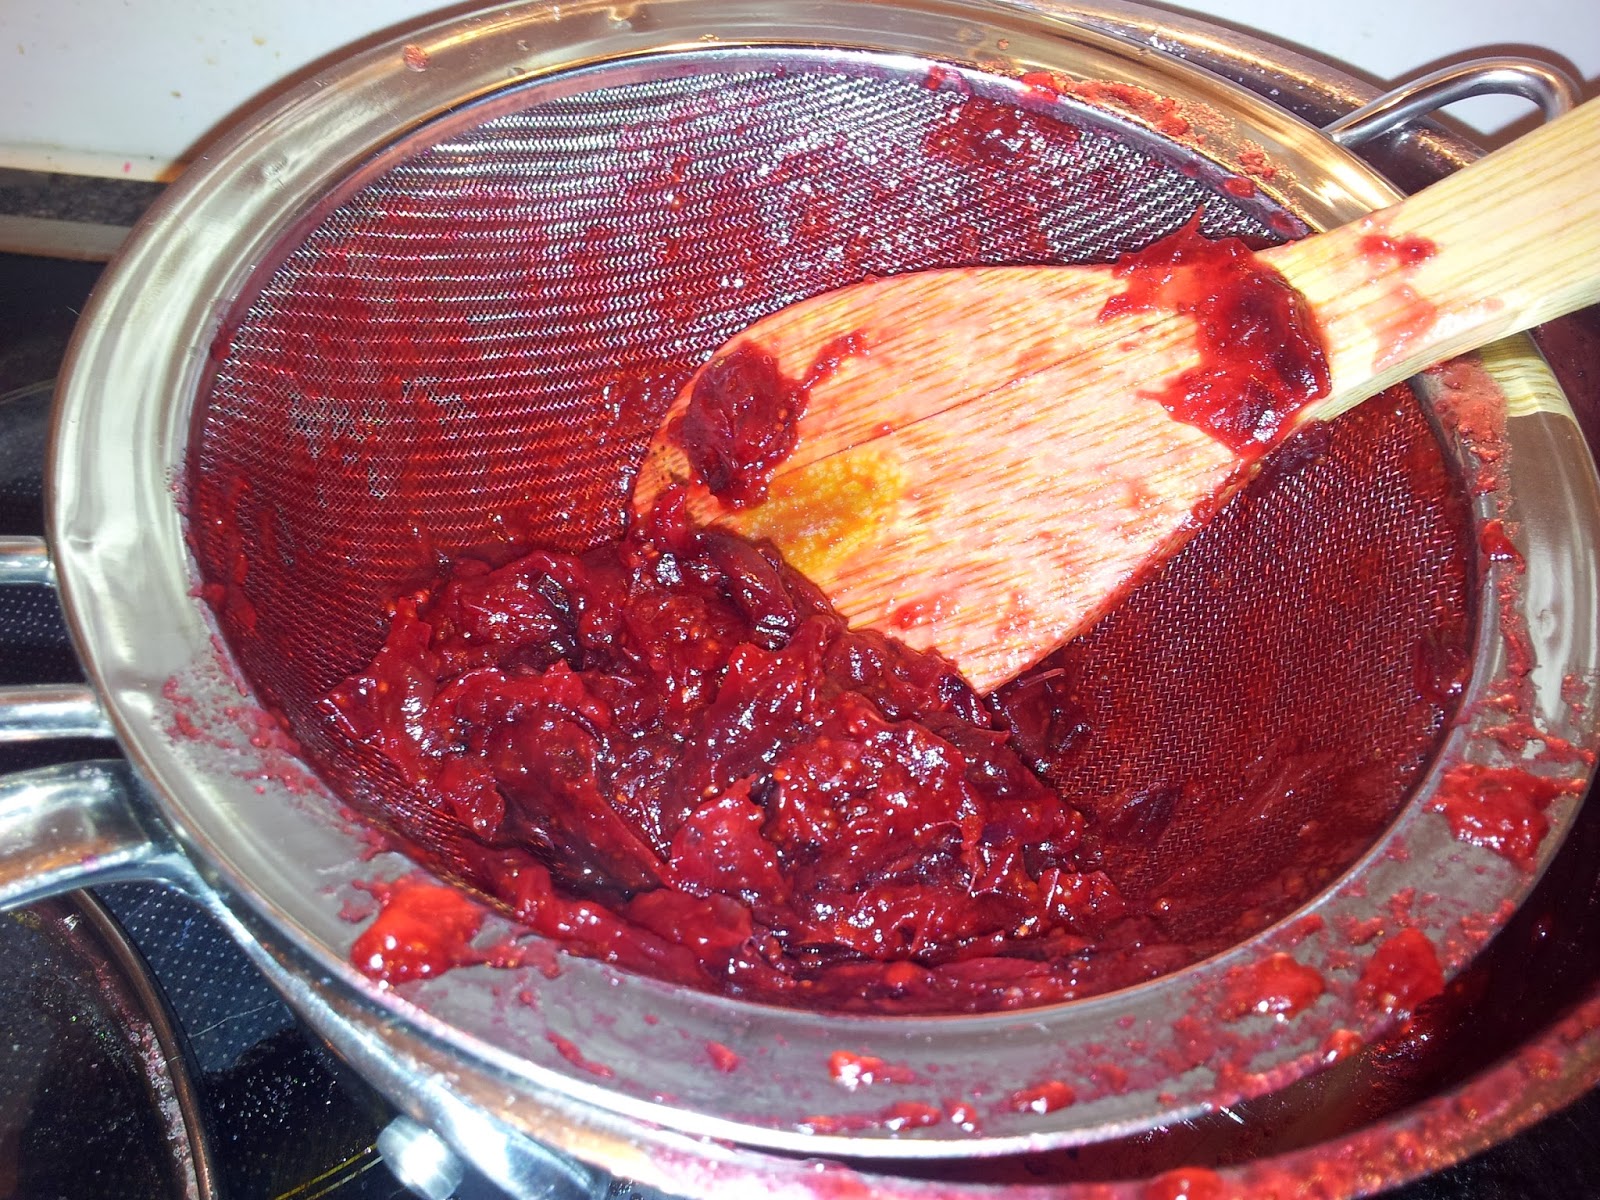
Put the strainer over a bowl and pour in the cranberry mixture. Gently press down with a spoon till you get as much of the juice into the bowl as possible, constantly moving the spoon in different directions.


Pour into whatever mold you would like - a bowl, a silicon shape pan, whatever. Let it cool and then put it in the fridge and hope you can stay away until you are ready to use it. :)


And done...seems to be a bit thicker than the canned kind, but still really good. Enjoy!


Sunday, September 30, 2012

Pepper Venison Escalope with Split Grilled Brocolli - AKA "Thow stuff on grill"

Hi everyone, I'm out of town with the kiddos so poor hubby has to make his own dinner. Before you feel too sorry for him though, I did completely stock the fridge with both homemade and ready meals for him, along with all the sides.  Of course, with the fridges we all have, it didn't last very long, but I gave him a kick start anyway :)
 
So here is the hubby, with enough time on his hands to post a great sounding recipe (hopefully he cleaned up the kitchen too!) :p
 
Hubby:
Here is the scenario: the wife is away with the kids and you are going to need to cook something for dinner. You want something manly. What do you do?

Usually when one thinks of manly culinary arts, the barbecue comes to mind. A vision of hamburgers and hot dogs grilled at a party is easy to conjure.

What a disapointment! These processed foods are the metrosexuals of the manly culinary repertoire! Repeat after me - real men eat wild game.

For those just coming around to the ideas, it helps to get into the spirit. Try saying "Wild Game" to yourself to pump yourself up. It sounds better when you yell it sort of like Duran Duran* in Wild Boys. WILD GAME! WILD GAME! WILD GAME!

Ted Nugent isn't returning my calls so I was forced to restrict my hunt to the local Coop grocery store. It is apparently hunting season in Switzerland and on offer were venison. The packaging helpfully allows you to identify which meat is from Stags and which from Does. I wanted to avoid having Sound of Music songs in my head while grilling so I thoughtfully chose a Stag escalope. The package clearly informs the consumer that it is indeed wild game. WILD GAME!

Nobody is exactly sure what the supply chain is like that gets wild game prepackaged into the fridge at our local Coop (some sort of hunting co-op?) but do not dwell on this. Keep your eye on the prize - WILD GAME!

This meal was planned as a "throw stuff on grill and cook until done" which is a great way to avoid recipe cards and other womanly pursuits. Despite what you may have heard, real men DO eat vegetables so make sure some sort of vegetable is included in the stuff that you throw on the grill. Don't think about it - just grab something at random while walking through the produce section. I grabbed a big head of broccoli since the stalk makes a nice handle which is easy to grab.

For those who need a recipe to operate, here ya go:

Ingredients:
  • 250g venison escalope - Stag or Doe (a deer, a female deer...)
  • Venison Marinade
    • Lemon Juice - 1 gs (gs = good squirt, approximately a tablespoon)
    • Worchestestestestchire Sauce - 1 tbsp
    • Soy Sauce - 1 tbsp (I use low sodium)
    • Freshly ground pepper - 1/2 tbsp
    • Vegetable Oil (canola or sunflower oil) - 3 tbsp
  • A vegetable too big to fall through the grate of the grill (I chose broccoli)
  • Vegetable dressing (this basically works with all vegetables)
    • Olive Oil
    • Cracked Pepper
    • a dash of salt

Instructions
1. Mix together venison marinade ingredients in a shallow bowl
 
2. Add venison
3. Put in refrigerator for at least 4 hours.
4. Watch sports
5. Watch more sports
6. Light grill.
7. Prep veggie - If vegetable is large and thick like a head of cabbage, cauliflower or broccoli - cut it in half.
 
8. Coat veggie with olive oil
9. Add cracked pepper to veggie
10. Optional - Wrap vegetable in aluminum foil
11. Throw vegetable on grill with medium heat and close the lid
12. After 5 minutes or so throw on venison
 
13. Cook until done
14. Serve

Do real men drink wine? If you are the kind of real man that drinks wine, let me suggest a wine pairing - Azabache Reserva 2008. It's a Spanish red with a fruity as opposed to overpowering taste. It goes well with this dish by both being full bodied, but also sweet and subtle to complement the rich and flavorful WILD GAME!

Serve with a salad and enjoy!


Well, thank you to my husband for writing up and taking pictures of that delicious looking dinner (the wine looks especially good right now with the little one hanging on me and crying!).
 
I'm glad I didn't have to type out the W. sauce as my spelling is probably even worse :p but it is easy to find. All the Coops I have been in seem to carry it in their international sections, but you can also order online from Coop or Migros fairly cheaply.  Sunflower oil is very easy to find and what I use the majority of the time. 
 
I have never had brocolli cooked on the grill like that...actually, I don't think I've had it any way on the grill, so I'm looking forward to trying it when I come home...maybe with a nice T-bone! :-D
 
What do you think? Should we have more 'mancooking' posts? (Personally, I think it's a fabulous idea as it means less cooking for me....and I know he's got a fantastic onion cake (dinner, not dessert) recipe, hummous, and a few others that I would love to share...
 
Until next time, Guten Appetit!  

Wednesday, August 15, 2012

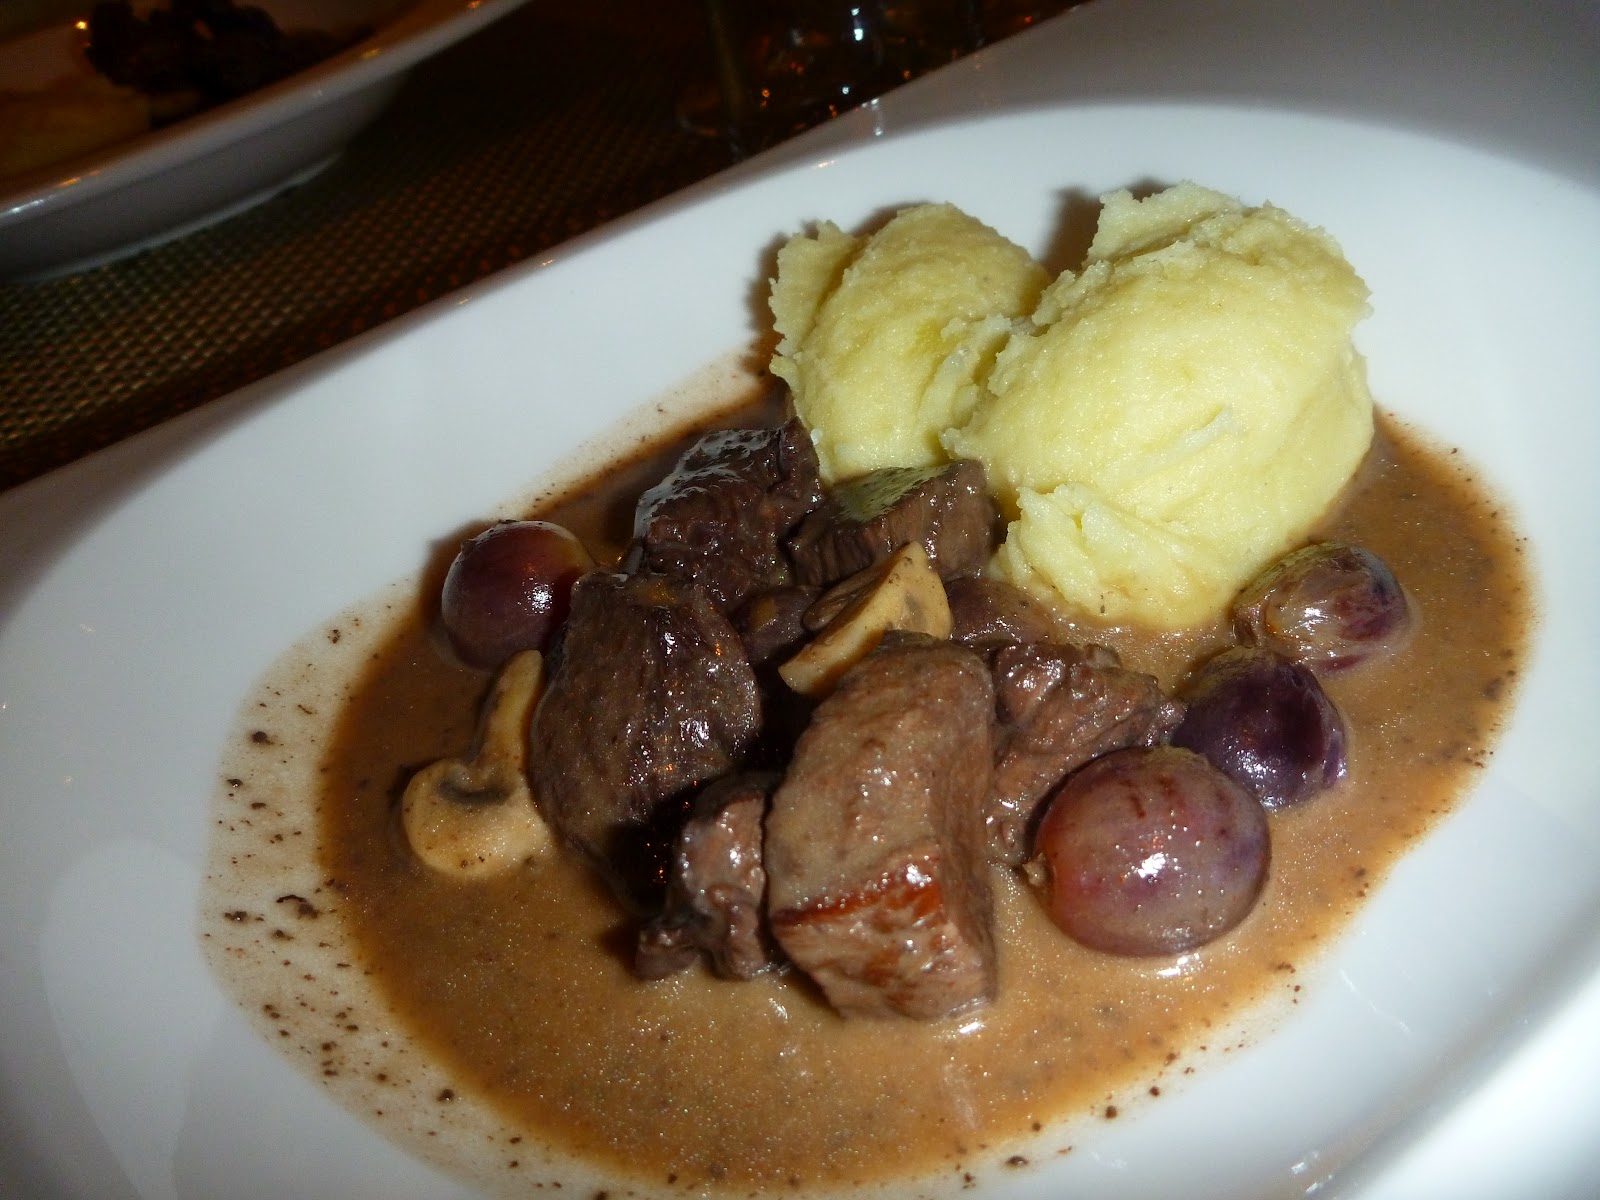
Pepper beef with mashed potatoes (Rindfleischpfeffer mit frischem Kartoffelstock)

Wow. This dish was incredible.  All of you who have a large fridge...make this soon...those without...wait til the temperatures are in the 40s and keep it outside.  This dish, you keep in the fridge for a week. That`s right, 7 days (6-8 recommended).  This is definitely an Autumn dish, and while Summer seems to have hidden from us, Fall will be here and you must try this.  It reminded me a lot of my mom`s steak and mushroom pie, though this was served in a lipped dish with mashed potatoes on the side.

Our teacher had prepared the dish a head of time, as obviously we weren`t going to be in class for an entire week, so we got to see the results and learn how to make it. Kind of like the time elapsed cooking shows...I wish my kitchen would do that by itself sometimes.

This is the second installment of the August cooking class, there will be one more, on a marinade/dip recipe -my shocking discovery on how a bowl full of chili peppers did not cause me to turn into a dragon and breathe fire.

What you need:

Beef ragout - stew meat, but cut it into smaller pieces,  at least 500 g
2 carrots, peeled and chopped
2 onions, peeled and chopped
celeriac, peeled and chopped
red wine, enough to cover the meat
1/3 - 1/2 cup red wine vinegar
gravy thickening agent (bratensauce)
3 or 4 bay leaves
1 tsp rosemary
1 tsp white peppercorns, crushed
1 tsp green peppercorns
1 tsp whole cloves
mushrooms
grapes or pineapple, whichever you prefer
optional: 1 finely sliced leek


For the potatoes
peeled potatoes, 500 g, steamed until tender
1/3 cup milk, may use more
1/2 tsp fresh nutmeg, grated
butter


Peel all your vegetables and dice up the beef.  Slice and put your veggies in a bowl

Add the beef and bay leaves

Add the rosemary

 Add crushed white peppercorns. You can put them on the counter and hit them with the bottom of a frying pan

Add black peppercorns and a few crushed garlic cloves


Add the red wine, enough to cover the beef


mix

Add the red wine vinegar and put it the fridge for between 4-7 days.  I think the longer the better, if you have the room.  You need to mix it up once per day, so there should not be any worry that you will think it is forgotten leftovers and just toss it away :)

This is the difference between the one we made on the left, and the one that had sat in the fridge, on the right.  (There are also sliced leeks in the one on the right, feel free to add them if you would like)

mine after 6 days in the fridge

Next, using a sieve if you have one, scoop out the meat and put it in a hot frying pan to sear it. 

Remove the meat and put the sauce, without vegetables on the stove. Add a gravy thickener (see below). Bring to a simmer and add the beef. 


Add sliced mushrooms and whole grapes or pineapple chunks. Simmer for 1.5 hours, until the beef is tender. You may need a little longer or a little less depending on the size of the beef chunks. 


Just before serving, mix about 1/4 cup of cream into the mixture. 

I added pineapple to mine instead of grapes. I also did half beef and half pork. It just melted in your mouth it was so tender. 


For the potatoes:

Peel them and then steam then until they are tender


Using your massive kitchen grinder...
yes, well, as most of us are not lucky enough to have the massive amount of room this requires, you can use a small mixer or a potato masher


Put the milk in a large saucepan. You can always add more milk, but you can`t take it away, so start out easy.  Warm it up and add some freshly grated nutmeg, if you have it, otherwise from the jar is fine. Add a dollop of butter, let it melt and then add the potatoes.  Mix well


Plate and serve immediately.  Enjoy!