Showing posts with label meatless. Show all posts

Thursday, January 2, 2014

Pizza - Surprise, it's Cauliflower!


Ok...so going along with the whole cauliflower thing, and that it was almost 2014 when I made this, I figured I would try out the cauliflower base for a pizza. Later this week I will try the zucchini one and see which one we like the best.  Now, This isn`t thick crust pizza, or even thin crust. However, it tasted nothing like cauliflower, more like if you had decided to use a flatbread for your crust. Obviously, there is a little more work involved than making your own dough, or even pulling out a store bought crust, but I think, overall, that it is worth the effort as you can still trick yourself into thinking it is pizza if you are trying to start out on the healthier side this year.

I looked at a bunch of different recipes and combined some and then made it my own way. Apparently nearly everyone has trouble picking it up like a regular pizza. However, good news for us on this side of the pond: that`s not what you do with pizza. We use a knife and fork to eat it. Problem solved. (Actually, mine held together relatively well, and I cut it into squares. The edge pieces I could pick up, but not the middle ones).

What you need:
1 head of cauliflower
1/4 cup grana padano (or parm) cheese
1/4 cup mozzarella or pizza cheese
1 egg
1/4 tsp majoram
1/4 tsp sage
1/4 tsp rosemary
1/4 tsp thyme
1/2 tsp basil
1/2 tsp oregano

 For the toppings, you will need to cook them while your dough is cooking as when you put it all together, you will keep it in just long enough for the cheese to melt.

I used mushrooms, red onions and bell peppers as that is what I had, but pile on your favorites! The more liquidy your ingredients though, the less likely your dough will be able to stay together.

Pre-heat your oven to 230 C

First, cut out the core of the cauliflower. This makes the florets pretty much just drop off without a ton of mess.


Now, I pureed mine next, and then put them in the microwave for 3 minutes. I have read the other way around as well. I think if you decide you want your cauliflower super fine, then microwave it first before putting it in the blender.  I have also seen large `rice` size chunks to `sand` size chunks. I started out on the larger side, then decided to blend again to make them smaller, thought I didn`t get down the sand size.


After you have microwaved it and chopped it up (whichever order you do), let it cool and then place in a clean dish towel and squeeze as much liquid out as you can. This will help it stay together a bit better.

Put in a bowl and add the spices, cheeses and egg. The cheese and egg will make it stay together. Feel free to add a bit more cheese if you would like.


Spread on parchment paper, add another piece on top and roll out to the desired shape. My cauliflower made 2 good size oval shapes. I did roll it rather thin though in the hopes that it would stay together well. Didn`t happen as much as I wanted (though it came apart in large chunks at least, not tiny ones). Next time I will try about 5 or 6mm.


Place in a hot oven, on top of parchment paper. Cook for 7 minutes and then carefully flip your dough and cook for another 5. Take out of the oven. Only the edges will be brown.


I did this a few hours before dinner in the hopes that it would dry a bit and stay together better.

Cook your toppings.


Go lightly on the sauce (though I did see someone suggested putting the cheese down first as a buffer), and then add your cooked toppings and the cheese.


Bake for 5 minutes, or until the cheese has melted. My hubby likes the cheese to be brown, so I needed to cook it a bit longer.


Enjoy, and if you get your crust to hold up like a real pizza, please share :)

Happy New Year!!

Here are some of the websites I was inspired by:
Domesticate Me
Cosmo Hippie Chef
Little Red Window

Monday, November 4, 2013

Vegetable Goat Cheese Tart


This is something I saw a picture of on Pinterest. Unfortunately, it was just an image, but if what I made isn`t the exact same as what I saw, at least it looks similar, and what it looks like I thought was very pretty.  Next time I make this, I will make individual ones. It is super simple, with only a few ingredients. So if you want something that looks beautiful, doesn`t cost much, or take a lot of effort, then this is for you.


What you need:
2 large or 3 medium zucchinis
2 large or 3 medium carrots
thyme (fresh or dried)
olive oil
goat cheese (or feta, or any other kind you like)
1 sheet of blätterteig - puff pastry
pie dish, or individual small baking bowls.

You can also use any other veggies that can peel into strips easily, yellow squash for example.

First, peel the outer layer off the vegetable. You do not need to be perfect.


Next, continue using a peeler, and peel strips until you get to the core of it.  Heat some water in a large pot, and when it boils, add the veg strips. The carrots will need a few minutes to begin to soften, the zucchini not more than a minute. Take them out and let them drain on a paper towel.  If you prefer crunchy veggies, you can skip this part.  Also, another option may be to carefully saute them. You want to keep them in long strips as much as possible as it will be easiest to make the tart.


When the vegetables are cool enough to handle, put 1 Tbls olive oil into a bowl and gently mix to coat. Add 2 Tbls fresh thyme or 1 Tbls dried and mix again.


Put your pastry a pie dish (or individual bowls) with some baking paper underneath, long enough to hang over the sides. This will allow easy removal after cooking. Spread some goat cheese on the pastry base (I used about 1 Tbls) and then you are ready to begin. I also added a little goat cheese around the sides of my last veg strip before folding over the dough. If you are using a different cheese, you can mix it in with the vegetables.


Pick up a vegetable strip - whichever you want, and roll it up like a tape measure so it is in a semi-tight coil. Continue to alternate with the different vegetables. When it gets too big to handle, set it in the middle of your pastry dough and then continue to wrap around it. If you do not have enough vegetables to fill your pan, you can push the dough in a little and then with the excess, use a cookie cutter and make shapes to layer around the edge.


Bake at the time and temperature indicated on your puff pastry, or at about 220 for 15 minutes.
For a golden crust, brush some egg on top of the pastry edge or shapes. Sprinkle with more cheese if desired.

brushed with egg


cut in half, you can see the goat cheese underneath


Individual tarts. These I hand rolled before putting them inside. There is parchment paper underneath so I could lift them out easily. 


Monday, August 26, 2013

Hummus


Ok, technically, this one isn`t from me. My husband made it. It is the most fantastic hummus. When he doesn`t have time, I buy it from the store - along with store bought pita - and it`s fine. It`s not great, but I`ll eat it. Yesterday, my husband made the hummus, and I made pita from scratch. I don`t know if it was the combination or what, but it was fantastic. I really don`t want to go back to store bought now.

Normally, he uses smoked garlic, but I couldn`t find any this time, so we used the regular garlic. Experiment to see which you like best!

What you need:

1 can of chickpeas (remove 3 or 4 for garnishing if desired)
1/2 cup lemon juice
1/2 cup Tahini (I get mine at Sihlcity)
1/4 cup greek yogurt
4 large (5-6 small) cloves garlic (try smoked if you can find it)
5-6 fresh mint leaves
3 sprigs parsley


Make sure you stir the tahini very well as it tends to separate into  oil on top and paste on the bottom. This may take a few minutes.

Use a garlic press for your garlic.

Put all the ingredients into a food processor (we just have a little one so make one batch at a time). Blend well.


If your mixture is too thick, then add additional lemon juice to your mixture. Do not add above 1/4 cup of extra lemon juice, instead switch to water if you find it necessary. The hummus should be thick - you just don`t want it to be solid :-) It needs to be able to stick to pita or veggies.

The blending will take about 6-8 minutes to reach a smooth consistency. Stop occasionally to check the consistency and mix with a spoon to insure that all the parts are well incorporated.

Once fully blended, pour into a serving bowl, add a few tablespoons of olive oil over the top (don`t mix in), add your extra chickpeas and maybe a sprig of mint or parsley.

Watch it all disappear quickly!


Thursday, August 15, 2013

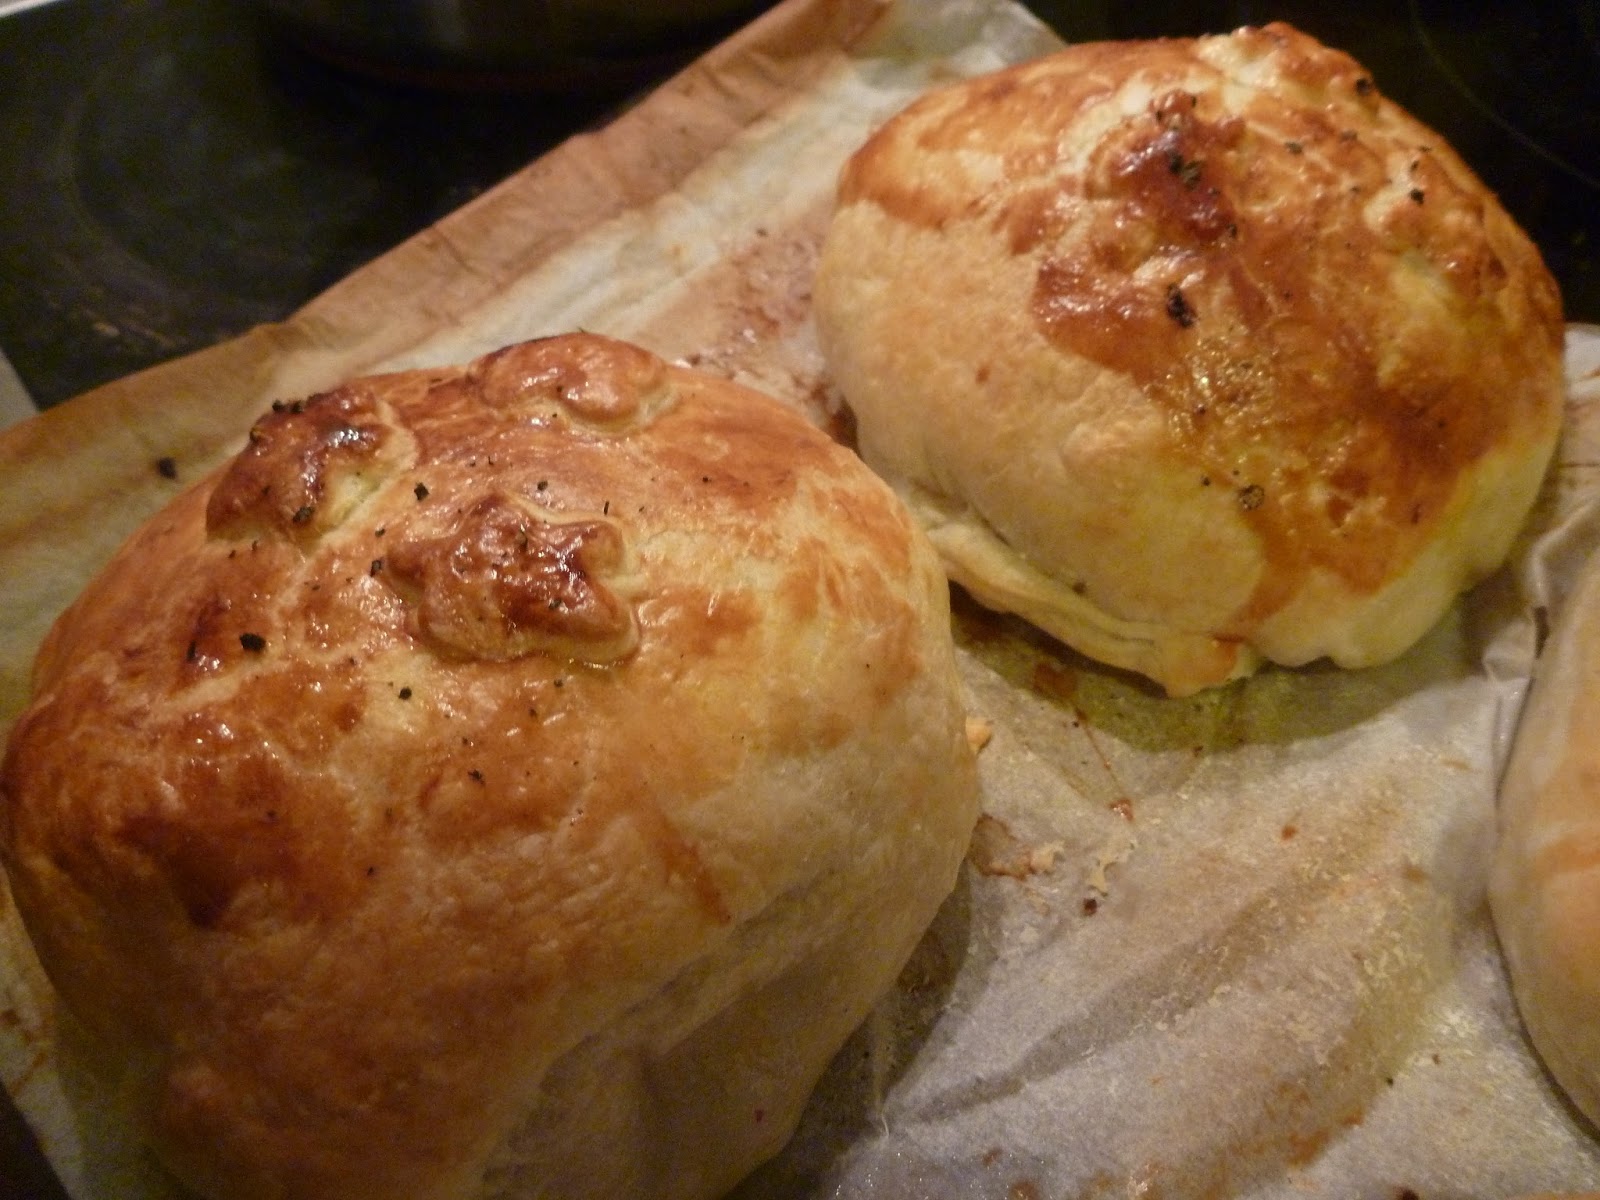
Pastry Wrapped Stuffed Portobello Mushrooms


This is one of my favorite things I have made recently. I love mushrooms, so it`s not really a big surprise. Unfortunately, I am having trouble finding the portobello mushrooms right now, but the beauty of this recipe is that you can actually make it without them. My husband and I both agree that it is better with though. This also freezes beautifully. This is something I have been working with as well recently.

What you need: This is for 4, but you can half it, or freeze half as needed (or double of course)

 4 portobello mushrooms, insides removed
1 package (about 500 g) of fresh mushrooms, sliced
2 Tbls butter
2 large cups of spinach - I haven`t measured yet, I just add about 3/4 of a bag of baby spinach or 1/2 a bag of regular. Depends on what I can find at the store.
2 Tbls olive oil
2 shallots, minced
4 garlic cloves, minced
2 tsp balsamic vinegar. I use the Aceto Basalmico because I think it tastes great
1/4 cup of pine nuts. I buy the small bag at Coop or Migros and use about 1/2 of it
1 Tbls bread crumbs. I use panko as I like the texture. I wouldn`t use the tiny grain sized bread crumbs if you can help it.
1 cup Gruyere, though I don`t use quite that much. You can also use the Gruyere/Emmentaler mix for a good flavor.
Salt and pepper to taste
1 sheet of Blätterteig. (puff pastry). Be sure to get the rectangular one as it is easier to cover the mushrooms.
1 egg

Pre-heat the oven to 190 C.

Rinse the mushrooms and take out the stems and the gills


Brush each side with a little bit of olive oil. Bake for 10 minutes, with the cap side up, and for 5-7 minutes down. Take out of the oven and set them on some paper towels to catch any extra liquid. 


While the mushrooms are cooking, in a large pan, add a little olive oil. Add half of the shallots and garlic. Cook about 3-5 minutes, until lightly browned. 


Add the spinach and mix well. 


Right when the spinach begins to melt, add the balsamic


Remove from the pan and place in a bowl. 

Put the butter in the same pan and add the rest of the shallot and garlic. Let cook about 2 minutes and then add the mushrooms


Add a little salt and pepper and cook the mushrooms until most of the moisture is gone


Remove the mushrooms and add to the spinach mixture. Mix and let cool (10-15 minutes).


While cooling, in a dry pan, toast your pine nuts. Remove when slightly browned and add to the mixture. 

Add the bread crumbs (or panko) and the cheese. 


Lay your puff pastry out and cut it into 4 even rectangles. Place one of the portobello mushrooms in each section, cap side down. Divide up the mixture and stuff the mushrooms. They will be over flowing. As long as you have a large puff pastry, this is fine. (And tasty!)


Very carefully, flip the filled mushrooms over


Bring up each side of the pastry to make a little package. One corner, side, corner, side, and so on. 

In a small bowl, mix up your egg and then brush some over the top of the dough to give it a nice brown color when cooked. I cut out extra pieces of dough for fun the first time I made this. 


Bake in the oven for the time and temperature directed on your blätterteig package. Usually at 200 C for about 15-20 minutes. The top should be a nice brown when it is done. 


If you would like to freeze this, simply place in a freezer bag, without the egg. To cook, let thaw, add the egg glaze and cook for the time indicated. Turns out great. 

You can also make this without the portobello mushroom, but I don`t think it is quite as good. I would double the filling recipe in this case though. 

The original recipe can be found here. I think this was the original link, there seem to be a few very similar ones now.