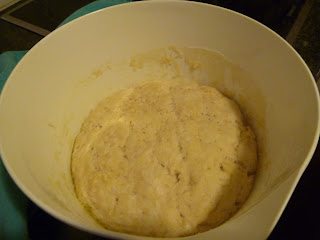
I made this pita bread about 5 years ago. I used US ingredients to do it and I remember thinking that it was easier just to buy the already made pita bread in the store. This weekend, I tried again, but used Swiss ingredients. It was much easier than I remembered, and the taste, with the hummus that I previously posted, was fantastic. I also made chicken skewers that I stuck inside with the hummus. I`ll post that recipe later this week.
One of the best things about this recipe is that after you make it and it rises, you can stick it in a bag and put it in the fridge. Just tear off as little or as much as you want and you can have fresh pita for every meal. How fantastic is that??
What you need:
3 cups of flour, plus extra for rolling and kneading (maybe a cup)
1 1/2 tsp salt
1 cup warm water
1 package yeast, 7 g
1 tsp sugar
1-2 Tbls olive oil
Now, the reason why I thought this was so easy, is that the back of my package of yeast says I can just mix it in with the flour, so there was none of the waiting like with other yeasts. If yours doesn`t say that, you may want to check the original recipe which states you need to mix the yeast, sugar and 1/2 cup of water and let sit for 15 minutes.
Mix the yeast, sugar and 1 cup of warm - not hot- water together. Add the flour and salt.
Mix until well combined.
Take the dough out of the bowl and then add a tablespoon or two of olive oil to coat the inside of the bowl and prevent sticking.
If you are going to cook the pita now, then tear off into small balls. I got 13 out of this. Do fewer if you would like larger pitas though. Let the balls sit for 10 minutes.
At this point, I decided I wanted to make them fresh the next day, so I put them in a zipping bag and stuck them in the fridge.
Put some flour on a hard surface and roll the dough out into a rough (or perfect if you can manage it) circle.
Place on a baking sheet and put in the oven. I think this next part was the hardest. You have to let it cook for 3 minutes, then flip it over and cook for another 3. I forgot with the first batch, so they got a bit browner than I was expecting.
Then, just remove from the oven, stack up and serve. Nothing better than warm pita and homemade hummus for an appetizer, or lunch, or dinner, or snack...
Enjoy!


No comments:
Post a Comment